How To Draw Tinkerbell And Her Friends
Tinkerbell is one of the favorites for little girls (and boys)…learning how to draw this little fairy would be a fun thing to do, wouldn't it? Below you will find easy instructions, with illustrated steps, that will help demonstrate how to draw her. Kids will love this lesson…have fun.
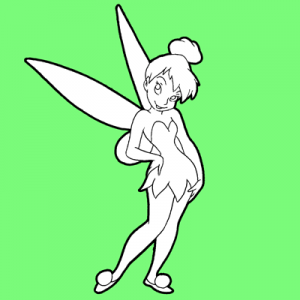
How to Draw Tinkerbell Step by Step with Simple Drawing Tutorial for Kids
Step 1

Start off by drawing a balloon on a string. Make sure the string is twice as long as the balloon. Then draw a cross section inside the balloon. The balloon is Tinkerbell's "head", while the string is her "spine". The vertical line determines the "center" of the head where the nose is placed, and the horizontal line determines where the eyes will be placed.
Step 2
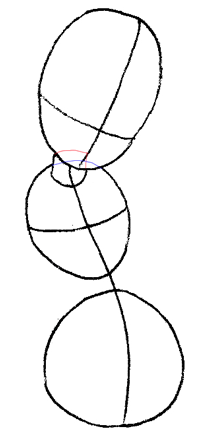
Add two egg shapes: one below the head, and one at the bottom of the spine. The top egg should be "upside down" while the bottom egg should be "right-side-up" and larger than the top egg. This will be your guide for Tinkerbell's feminine curves.
Step 3
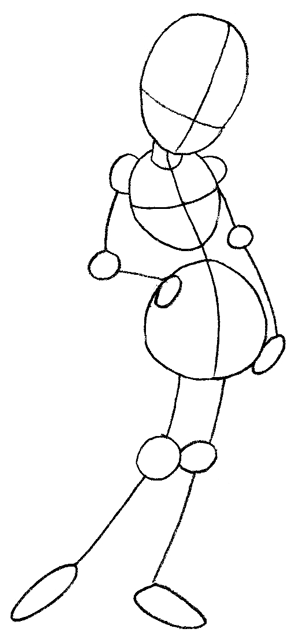
Now that you've done her body, you can now add stick lines to give her arms and legs. Remember, each circle determines a joint.
Step 4
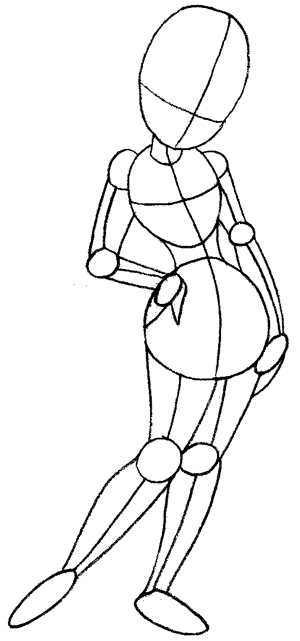
Now connect all the circle joints to give Tinkerbell some muscle.
Step 5
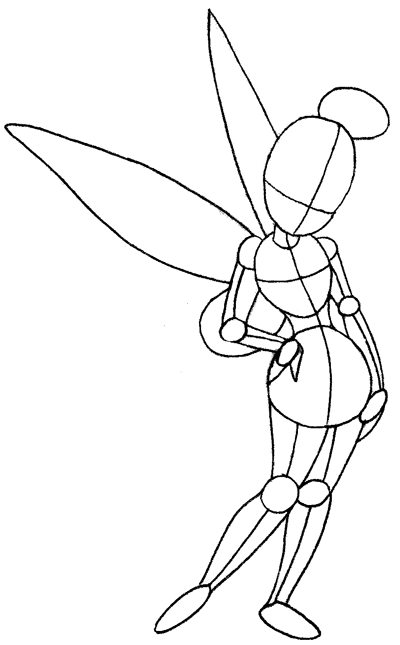
From here, you can now add her wings and her hair bun. Her wings are actually composed of two thin leaf shapes on top, and two fat ovals at the bottom. Her hair bun is also just an oval.
Step 6

Now lets focus on Tinkerbelle's face. Draw her eyes upon the horizontal line….notice where the eyes are upon them. Draw the eye shape by drawing a half oval on the bottom of the eye, but at the top of the eye, make the curve flatter than an oval's curve. If you need practice…print this page out and trace it a few times (either with tracing paper or by taping it to a window and letting the sunlight turn normal paper into tracing paper. Draw her nose on the right side of the vertical guide….as a backwards 'L' shape. Draw the top of her smile as well. Also draw a backwards 'c' shape for her ear.
Step 7
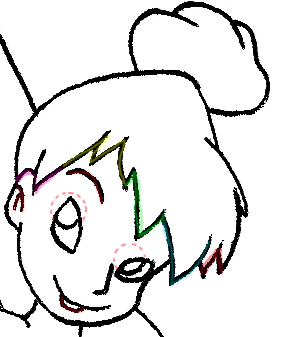
Now draw the iris of Tinkerbell's eye by drawing a circle and erasing the part that is outside the outer-eye. Also draw the bottom of Tinkerbell's mouth, her eyebrow, and the inside of her ear (a 'T' shape). To draw the hairline, I have used several different colors to show you shapes that are easier to draw…from left to right….in purple – a number '2'….in yellow – a letter 'M'…..in green – a sideways letter 'Z' … in blue – a sideways capital letter 'L' …. in red an upside down letter 'v'. Seeing letters and numbers when you draw….is a ways to break down more difficult shapes into shapes that you have already memorized how to draw.
Step 8
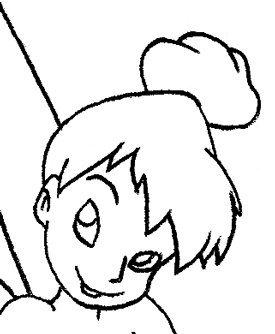
This is what Tinkerbell's face should look like now.
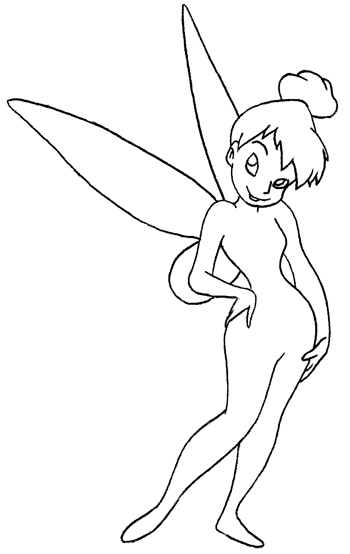
You can now see her face on her figure.
Step 9 – Finish Up Your Tinkerbelle Drawing
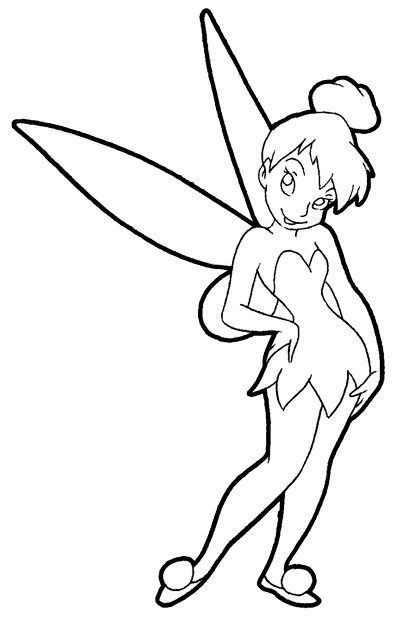
Add her clothes, and you're done. Notice that the bottom of her dress looks like some letter 'M's or sideways letter 'z's. The top of her dress looks like a sideways number '3'. Use these tricks to make drawing easier. I hope that you had fun…show off your Tinkerbelle drawing to all of your friends and family members and they will be in awe of you. 🙂
Technorati Tags: tinkerbell, tinkerbelle, draw tinkerbell, how to draw tinkerbell, draw tinkerbell step by step, draw fairy, drawing fairies, how to draw a fairy, draw fairies, how to draw, drawing lessons, drawing tutorials, drawing for kids

How To Draw Tinkerbell And Her Friends
Source: https://www.drawinghowtodraw.com/stepbystepdrawinglessons/2010/10/how-to-draw-tinkerbell-step-by-step-with-easy-drawing-lesson/
Posted by: rodriguezalmou1981.blogspot.com

0 Response to "How To Draw Tinkerbell And Her Friends"
Post a Comment